Young's Experiment Activity Sheet
Purpose:
The purpose of this activity is to perform Young's experiment in a simulated environment in order to determine the wavelength of light.
Background:
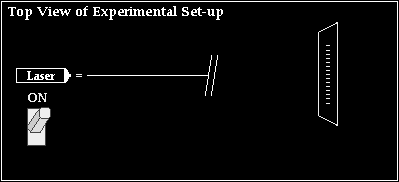
In this activity, you will analyze a two-point source light interference pattern which is projected onto a screen. The interface is divided into two important sections. The top section represents the experimental set-up as it would be seen from above. The set-up consists of a laser beam of unknown wavelength, a double slit, a screen upon which the interference pattern is projected, and an On/Off button.

The bottom section of the interface represents the appearance of the screen as seen from the "front." This view allows you to see the actual interference pattern; the interference pattern consists of a series of bright and dark bands. These bands are the result of the interference of the waves which diffract through the two slits.

On-screen buttons can be used to make measurements of the important variables (y and L) which are necessary for determining the wavelength of the laser light. Furthermore, the important variables (d, y, L, and λ) can be modified to investigate the effect of a variation of one variable upon another. You will make the measurements which are needed in order to use Young's equation and calculate the wavelength of the light waves which created the pattern.
Getting Ready:
-
Open the Young's Experiment page in the Shockwave Physics Studios section of the web site.
-
As you begin the activity, you will be asked to enter your name and student ID number. Do NOT skip this step.
-
After clicking the START button, the Front View and the Top View of the experimental set-up will be displayed. Gain familiarity with all the interface controls (On/Off button, Slip Separation pull-down menu, Move Screen buttons and Modify Wavelength buttons) by experimenting with their use.
-
If you need help with using any portion of the interface, then click on the Help button present at the bottom right section of the interface. Help information will be provided on a web page in a separate window.
Conceptual Analysis:
1. Move the screen closer and further from the sources by using the Move Screen arrows. Observe the changes in the pattern which is projected onto the screen. Complete the following sentences.
-
As the screen is moved further from the slits, the distance between bright bands ____________ (increases, decreases, remains the same).
-
As the screen is moved closer to the slits, the distance between bright bands ____________ (increases, decreases, remains the same).
-
The band separation distance (y) and the slit-to-screen distance (L) are ____________ (directly, inversely) related.
2. Increase and decrease the wavelength of light using the Modify λ arrows. Observe the changes in the pattern which is projected onto the screen. Complete the following sentences.
-
As the wavelength is increased, the distance between bright bands ____________ (increases, decreases, remains the same).
-
As the wavelength is decreased, the distance between bright bands ____________ (increases, decreases, remains the same).
-
The band separation distance (y) and the wavelength (λ) are ____________ (directly, inversely) related.
3. Use the pull-down menu for Slit Separation Distance to investigate the effect of changing the distance between slits. Observe the changes in the pattern which is projected onto the screen. Complete the following sentences.
-
As the slit separation distance is increased, the distance between bright bands ____________ (increases, decreases, remains the same).
-
As the slit separation distance is decreased, the distance between bright bands ____________ (increases, decreases, remains the same).
-
The band separation distance (y) and the slit separation distance (d) are ____________ (directly, inversely) related.
Mathematical Analysis:
4. Make on-screen measurements of the appropriate values and determine the wavelength of light. Record your data (in meters) in the Data section. Show your calculations for the first two rows in the Calculations section. Once you have determined a wavelength value, click on the Check Answer button. Enter your answer (in nanometers) and click on the Evaluate button.
5. Follow all on-screen prompts and directions to complete the measurement for various values of length and slit separation distance. To earn credit, you will have to successfully determine the wavelength of light for three different patterns; you are allotted three misses.
6. If your teacher uses success codes to verify completion of these activities, then write down your success code when you are done.
Success Code: _________________________
Data:
|
y
(m)
|
m |
d
(m)
|
L
(m)
|
Wavelength
(nm)
|
|
|
|
|
|
|
|
|
|
|
|
|
|
|
|
|
|
|
|
|
|
|
|
|
|
|
|
|
|
|
|
|
|
|
|
|
|
|
|
|
|
|
Calculations:
Show your work (clearly) for the first two rows of the data table above.
Conclusion:
In a well-written paragraph, summarize the procedure used by Thomas Young in order to measure the wavelength of light. Do a bang-up job!